During my 2015 summer vacation we made plans to go to the Diergaarde Blijdorp (Zoo) in Rotterdam. As we might not be the only people having this idea, and we didn't want to spend a lot of time queuing for tickets, we decided to buy tickets on-line. As a side effect this was saving us EUR 3.00 per ticket, as the on-line tickets were cheaper. So, before we left the house to start traveling to Rotterdam I went on-line and bought our tickets. All going smooth, until the website was telling me to take a printed copy of the tickets with me as electronic tickets on smartphones were not acceptable for this location. When hitting the print button on my PC, nothing happened.
As there was some time-pressure not to waste too much time, there was an unconscious Situation Appraisal around the concern of the non-printing tickets. Clarifying this it turned out that the tickets were made available to me as pdf-documents. My web-browser had presented these tickets to me in the Adobe Acroread tool, and hitting the regular print button didn't make the pdf-file to come out of the printer. A closer look into the Windows 7 print queue, showed the document to be printed waiting on the queue, not making much progress. A quick inspection of the printer showed something unusual: the printer was switched on with both the power and network LED blinking simultanuously.
As there was no time for serious troubleshooting, I just powered the Samsung ML-2571N printer off and on, to find the previous behavior was still there. Even leaving the power switched off for more than 30 secs, and removing the network cable didn't cure the problem. As I was convinced about basic ingredients (toner, and paper) available in the device, I had to give up. Plan B was to contact the ticket office and ask for other options on how to use the freshly bought tickets (to adults takes EUR 38 out of your pocket nowadays...). I was happy to find their phone number, and was quickly informed that a recent change was made to the entry system at the Zoo allowing for tickets on smartphones to be accepted. So my 2 actions were clarified.
Obviously the first action had priority over the second, and soon after we were off to Rotterdam, and had a great day at the Zoo.
Once home again, the interesting part of my day was still to come, considering I like troubleshooting. The printer was still standing in the home-office, and its behavior hadn't changed. Checking the User Manual for the printer didn't show the observed flashing of LEDs. A quick search on-line for a service manual, didn't provide me any access to a free copy of such a document, except for a excerpt of a single chapter showing the exploded view and parts list for my printer.
All attempts to hard-reset the printer were unsuccessful, and the original fault remained unchanged as soon as the printer was switched on. Additional detail was that sometimes I would be able to hear a relay click in the printer at the same rate as the flashing LEDs. That's all there was.
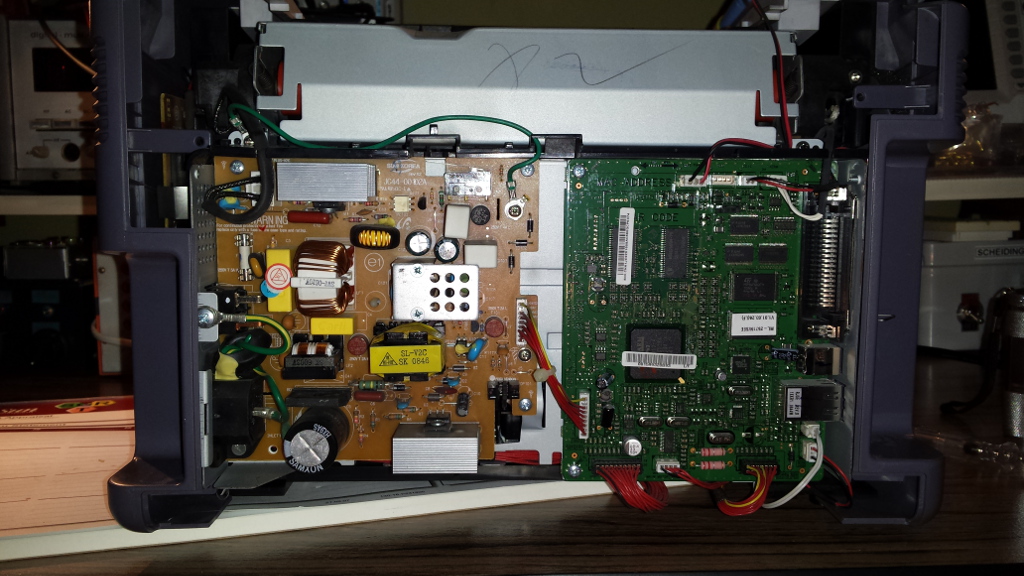
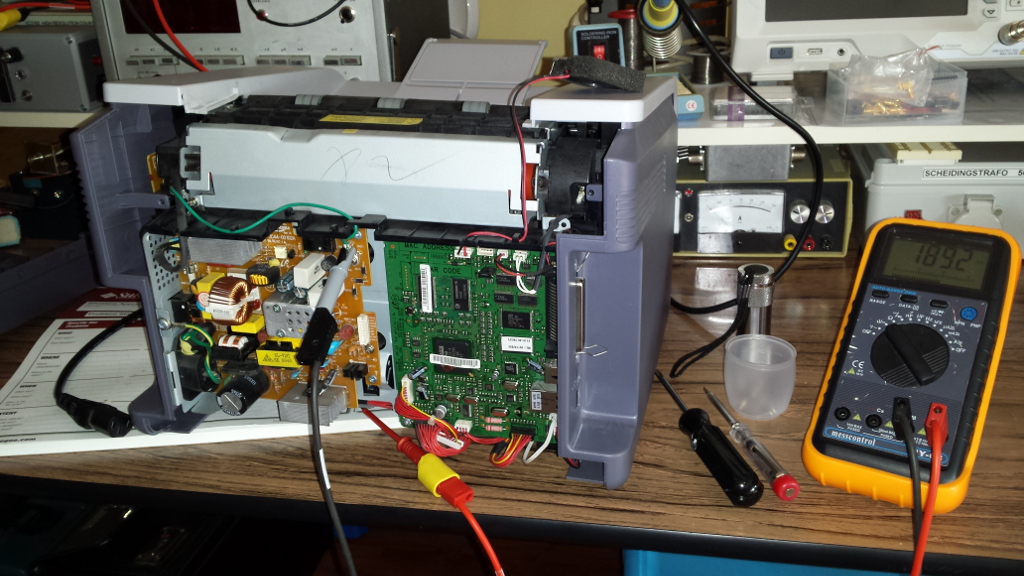
Thanks to the exploded view of the printer I was easily able to locate the power-supply and controller board behind the back panel of the printer. Soon after that the printer was on the workbench and the backcover removed.
This picture clearly shows two printed circuit boards. The brown one on the left, is clearly a switched mode powe-supply (SMPS), while the green PCB on the right is clearly the controller that drives the housekeeping of the printer. A quick visual inspection for burned parts didn't show any obviously reason for failure. Two details drawing attention: there is a clear part identifier at the top of the SMPS board, mentioning Sun Korea and JC44-00102A (rev 12). It could very well be that this SMPS board is a standard solution in many different products, that could be worth some further research later. The other interesting detail was the connector on the right side of the SMPS board, with clear markings of the pins. Here's the detailed picture taken after the connector for the cable going to the controller board was removed.
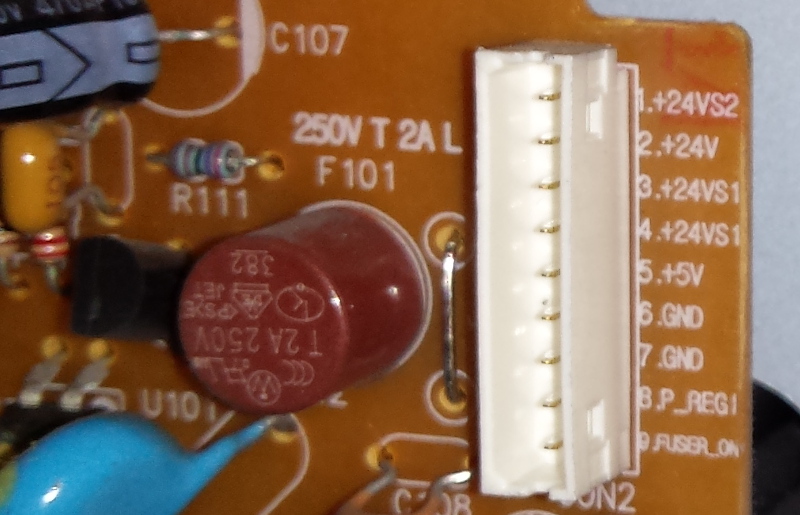
A quick check with a digital multimeter for availability of the mentioned voltage ratings, showed that the 5 Volt (typically used for all the logic on the controller board), was only reading a variable voltage of between 2 and just under 4 Volt, while the 24 Volt lines were all over the place never anywhere close to 24 Volt. These measurements were pretty much the same with the connector cable inserted and removed.
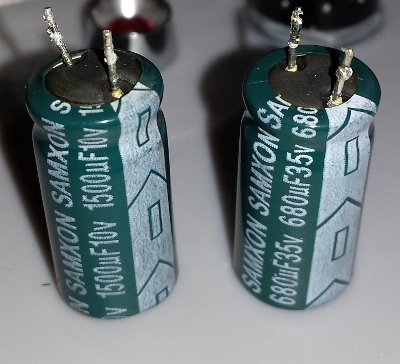
When removing the SMPS board for further inspection it hit my eye that one of the electrolytic capacitors had a slight buldge on the top of the device. This is a well known failure mode for these types of capacitors, particularly when used in heavy duty circumstances like an SMPS. The picture below shows the suspect Electrolytic Capacitor clearly marked. Its neighbour is similarly suspect, as it's so close and having very similar ratings.
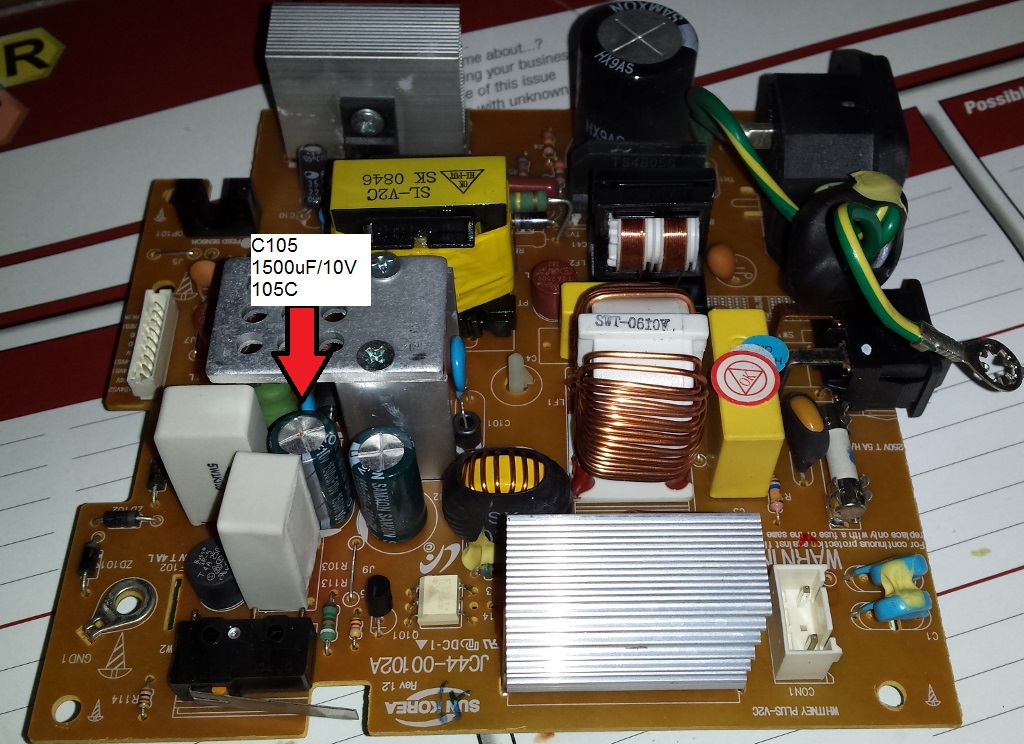
It appears the major suspect is marked as component C105 having a value of 1500uF/10Volt while its neighbour is marked as C102 having a value of 680uF/35Volt. Both capacitors are for use at max 105C which is the common high value for use in Switch Mode Power Supplies. As I recently did a homebrew project to measure the ESR of electrolytic capacitors, this freshly created instrument came in very handy in this situation. After nulling the meter, I connected both suspected capacitors. As can be seen in the picture below, the 1500uF capacitor has a clearly increased ESR of close to 2 ohms, which is too high for proper functioning in this SMPS. The other capacitor did check out with a reading of zero ohms. Although the latter is correct for the moment, both will be replaced considering the age (printer was bought in 2009) and conditions of use (my home office has a typical ambient temparature of 25+ Celcius).
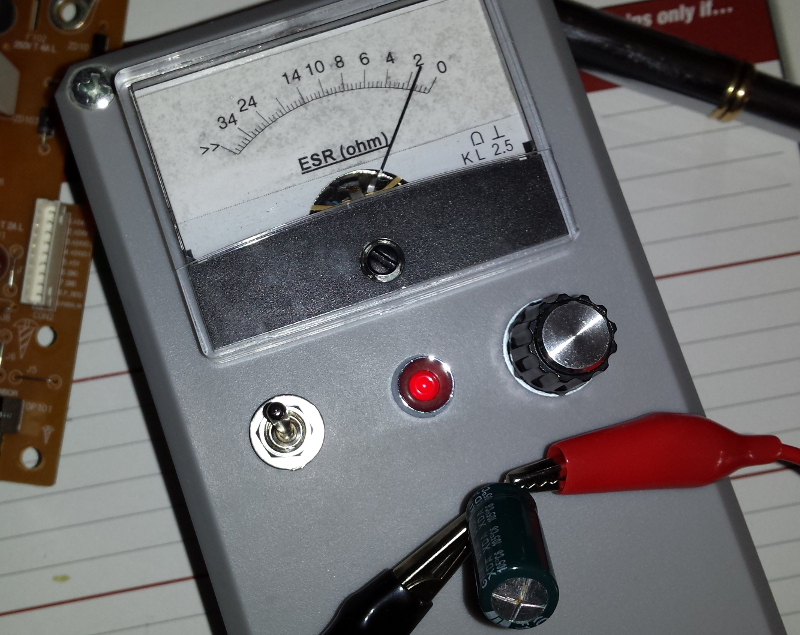
Now the capacitors are removed from the PCB, the 1500uF capacitor is clearly buldges on both sides. The picture below shows nicely how wobbly is stands as a result of this on the flat surface of the ESR meter.
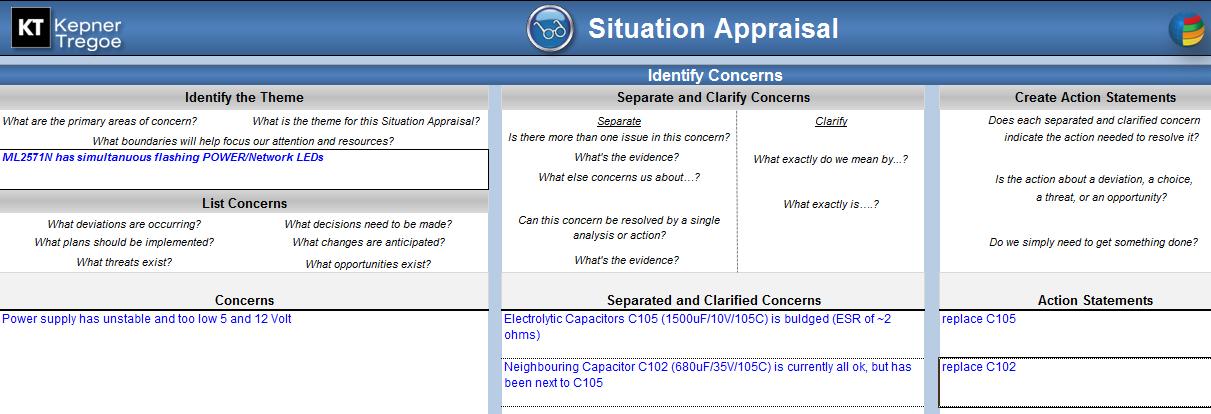
At this point it's time to document my extended Situation Appraisal.
I appear lucky living in the Brainport of Europe as we still have some shops selling electronics parts. My most local one is Brigatti who could supply the necessary 2 capacitors for a whopping EUR 1.40. If you're not used to Euros, that's about 25% of a Belgium Beer on an average outdoor terrace. As soon as I put the capacitors in place, and put the printer together again, all started working again. When the printer got onto the local network, my two Zoo tickets came out instantanuously...
